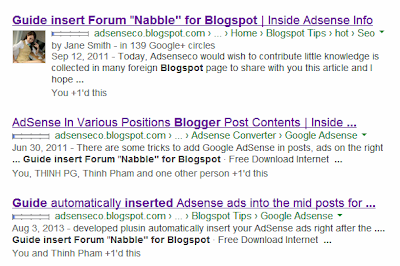
Utility assessment "Star Rating" of the blog / site to use to assess the level of application of article readers. Basically this utility is similar to google+, like facebook, tweeter, but the interface looks better. So today Adsenseco will share with everyone how to create a utility evaluation forms for "Star Rating" not only for bloggers but also articles in the comment section of the blog. In addition, this utility also displays via the Google search engine is very nice, this is obviously good for SEO. View the demo here
Star Rating Rich Snippet for Blogspot
Insert this code to your template : find code <data:post.body/> at edit html (Note: For custom templates with the code "<data:post.body/>" code 3 to 6 or more. You have to find the code "<data:post.body/>" the final code in HTML)
 |
| Guide Star Rating Rich Snippet standard SEO of Google Snippets for Blogspot |
Insert this code to your template : find code <data:post.body/> at edit html (Note: For custom templates with the code "<data:post.body/>" code 3 to 6 or more. You have to find the code "<data:post.body/>" the final code in HTML)
 |
| Star Rating Rich Snippet for Blogspot |
Paste this code below <data:post.body/>
Google Authorship
Incorporating Authorship isn’t hard. Here’s the step-by-step guide so you don’t get confused (as I did in the early days of authorship).
After make a changes, save template and then cek you posts link here : http://www.google.com/webmasters/tools/richsnippets
<p> <b:if cond='data:blog.pageType == "item"'> <div style='margin-top:30px'> <div itemscope='' itemtype='http://data-vocabulary.org/Review-aggregate'> <div style='padding:5px; width:85px; float:left;'> <img height='55px' itemprop='photo' src='insert your profile picture google+' width='55px'/></div> <div style='padding:5px; font-size:11px; float:left;'> Title Post: <span itemprop='itemreviewed'><b><data:post.title/></b></span><br/> Rating: <span itemprop='rating' itemscope='' itemtype='http://data-vocabulary.org/Rating'> <span itemprop='average'>100%</span> </span> based on <span itemprop='votes'>99998</span> ratings. <span itemprop='count'>5</span> user reviews.<br/> Author: <b><a href='Insert your link profile Google+ '><data:post.author/></a></b><br/><br/> Thanks for read this post.</div> </div> </div> </b:if> </p>
The status bar "breadcrumb" for Blogspot
Breadcrumb is a utility that is used quite common, especially in the Web / Blog running on Wordpress platform. Along with the utility "Page Navigation - Blogspot paging", both of which contribute to better navigate the Web / Blog.
Moreover, with breadrumb, readers can learn topics you are following the account (Breadcrumbs based on a post's category), the amount of time (Breadcrumbs based on a post's date), can help increase the amount of click readers and pull them to stay longer than your blog.
 |
| The status bar "breadcrumb" for Blogspot |
1. First you Login to the blog => Design => Edit HTML => Expand utility model and follow the steps below:
2. Find the code below:
<b:include data='top' name='status-message'/>
And replace it:
<b:include data='top' name='status-message'/>
<b:include data='posts' name='breadcrumb'/>
3. Next, find this code:
<b:includable id='main' var='top'>
And replace it:
<b:includable id='breadcrumb' var='posts'>
<b:if cond='data:blog.homepageUrl == data:blog.url'>
<!-- No breadcrumb on home page -->
<b:else/>
<b:if cond='data:blog.pageType == "item"'>
<!-- breadcrumb for the post page -->
<p class='breadcrumbs'>
<span class='post-labels'>
<a expr:href='data:blog.homepageUrl' rel='tag'>Home</a>
<b:loop values='data:posts' var='post'>
<b:if cond='data:post.labels'>
<b:loop values='data:post.labels' var='label'>
<b:if cond='data:label.isLast == "true"'> »
<a expr:href='data:label.url' rel='tag'><data:label.name/></a>
</b:if>
</b:loop>
<b:else/>
»Unlabelled
</b:if>
» <span><data:post.title/></span>
</b:loop>
</span>
</p>
<b:else/>
<b:if cond='data:blog.pageType == "archive"'>
<!-- breadcrumb for the label archive page and search pages.. -->
<p class='breadcrumbs'>
<span class='post-labels'>
<a expr:href='data:blog.homepageUrl'>Home</a> » Archives for <data:blog.pageName/>
</span>
</p>
<b:else/>
<b:if cond='data:blog.pageType == "index"'>
<p class='breadcrumbs'>
<span class='post-labels'>
<b:if cond='data:blog.pageName == ""'>
<a expr:href='data:blog.homepageUrl'>Home</a> » All posts
<b:else/>
<a expr:href='data:blog.homepageUrl'>Home</a> » Posts filed under <data:blog.pageName/>
</b:if>
</span>
</p>
</b:if>
</b:if>
</b:if>
</b:if>
</b:includable>
<b:includable id='main' var='top'>
- You can edit the Green part of your liking.
4. Finally, add the code below in your CSS before the closing: ]]</b:skin>
.breadcrumbs {
padding:5px 5px 5px 0px;
margin: 0px 0px 15px 0px;
font-size:95%;
line-height: 1.4em;
border-bottom:3px double #e6e4e3;
}
Incorporating Authorship isn’t hard. Here’s the step-by-step guide so you don’t get confused (as I did in the early days of authorship).
- Set up your Google+ profile. If you have a Gmail account, you probably already have an Google+ account. If not, you can sign up on Google+.
 |
| Add your contributor links |
- Add your contributor links. These tell Google where to look for your content. This is a screenshot of what mine look like.
- Insert this code to your template between <head> code :
<head>
<link href='url google plus ' rel='author'/>
<link href='url google plus' rel='publisher'/>
</head>
 |
| Google Authorship |